If you have ever wondered whether an outlet is live, wanted to check if a circuit breaker is working, or needed to diagnose a basic electrical problem at home — a multimeter is the tool you need. And the good news is that using one is far simpler than it looks.
A multimeter is an inexpensive handheld device that measures voltage, current, and resistance in electrical circuits. In this complete beginner’s guide we will focus specifically on how to use a multimeter to test voltage — the most common and most useful thing a homeowner will ever need to do with one. We will walk you through every step clearly and safely so you can get accurate readings with confidence.
What Is a Multimeter and What Does It Do?
A multimeter — sometimes called a volt-ohm meter or VOM — is a device that measures three key electrical properties:
- Voltage (V): The electrical pressure driving current through a circuit — measured in volts
- Current (A): The flow of electrical charge through a circuit — measured in amperes
- Resistance (Ω): The opposition to current flow in a circuit — measured in ohms
For most homeowners the voltage testing function is the most useful. It tells you whether an outlet has power, whether a circuit is live, whether a battery is charged, and whether your home’s electrical system is operating within safe parameters.
Types of Multimeters: Which One Do You Need?
Before buying a multimeter it helps to understand the two main types:
Analog multimeters use a needle on a scale to display readings. They are older technology, require more experience to read accurately, and are less common today.
Digital multimeters (DMM) display readings as a number on a screen. They are easy to read, more accurate, and the right choice for beginners. For basic home voltage testing, a digital multimeter in the $15 to $50 range is perfectly adequate.
Auto-ranging vs manual-ranging: Auto-ranging multimeters automatically select the correct measurement range for you — ideal for beginners. Manual-ranging multimeters require you to select the range yourself, which requires more knowledge. Always choose auto-ranging if you are new to using a multimeter.
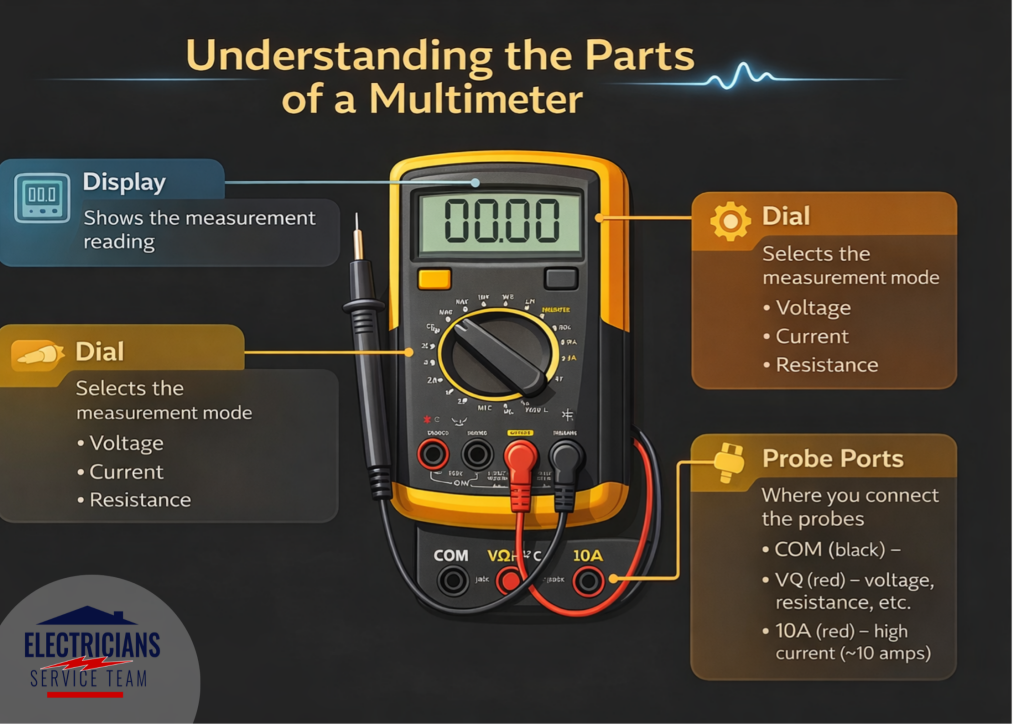
Understanding the Parts of a Multimeter
Before you start testing anything, familiarize yourself with the three main parts of your multimeter:
The display: Shows your measurement reading as a number. On an auto-ranging multimeter the display also shows the unit of measurement automatically.
The dial or selector switch: The large rotary dial in the center of the multimeter. You turn this to select what you want to measure — voltage, current, resistance, and so on.
The probe ports and test leads: Your multimeter comes with two test leads — a red probe and a black probe. These connect to the multimeter through ports on the front of the device. There are typically three ports:
- COM (Common): The black probe always plugs into this port
- VΩmA: The red probe plugs into this port for voltage, resistance, and low current measurements
- 10A or 20A: The red probe plugs into this port only when measuring high current — leave the red probe in VΩmA for all voltage testing
Safety First: What You Must Know Before Testing Voltage
Working with electricity always carries risk. Follow these safety rules every single time you use a multimeter:
- Never touch the metal tips of the probes while the other ends are connected to a live circuit — always hold the probes by their insulated handles only
- Inspect your test leads before every use — cracked insulation or exposed wire on the leads is a serious shock hazard and the leads must be replaced before use
- Start with the highest voltage range if you are using a manual-ranging multimeter and you are unsure of the voltage — dial down from there
- Keep one hand in your pocket or behind your back when probing live circuits — this prevents current from flowing across your chest if accidental contact is made
- Never use a multimeter that shows damage — a cracked case, loose probes, or a blank display means the tool needs to be replaced
- Never exceed the multimeter’s rated voltage — check your device’s maximum voltage rating before testing
How to Test Voltage With a Multimeter: Step by Step
Step 1: Insert the Test Leads
Insert the black test lead into the COM port and the red test lead into the VΩmA port. These are the correct ports for all voltage measurements. Make sure both leads are pushed in firmly and seated securely.
Step 2: Turn the Dial to Voltage
Turn the selector dial to the voltage setting. You will see two voltage options on most multimeters:
- VAC or V~: AC voltage — used for testing household outlets, light switches, circuit breakers, and any standard household wiring. This is what you will use most of the time.
- VDC or V=: DC voltage — used for testing batteries, car electrical systems, and low-voltage DC circuits.
For testing a standard household outlet or circuit, select VAC.
If you have a manual-ranging multimeter select a range higher than the voltage you expect to measure. For standard US household circuits select 200V AC or higher. If you have an auto-ranging multimeter it will select the range for you automatically.
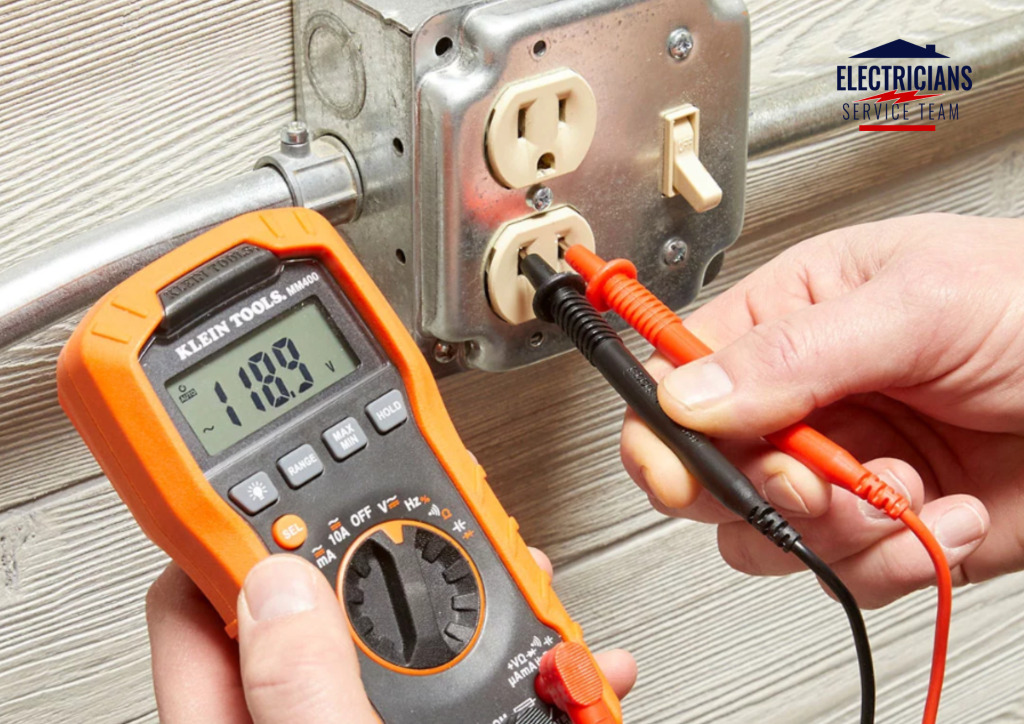
Step 3: Test a Live Outlet
Testing a household outlet is the most common voltage test a homeowner will perform. Here is how to do it safely:
- Make sure your hands are dry and you are standing on a dry surface.
- Hold the black probe by its insulated handle and insert the metal tip into the longer slot of the outlet — this is the neutral slot.
- Hold the red probe by its insulated handle and insert the metal tip into the shorter slot — this is the hot slot.
- Read the number on the display.
What the reading means:
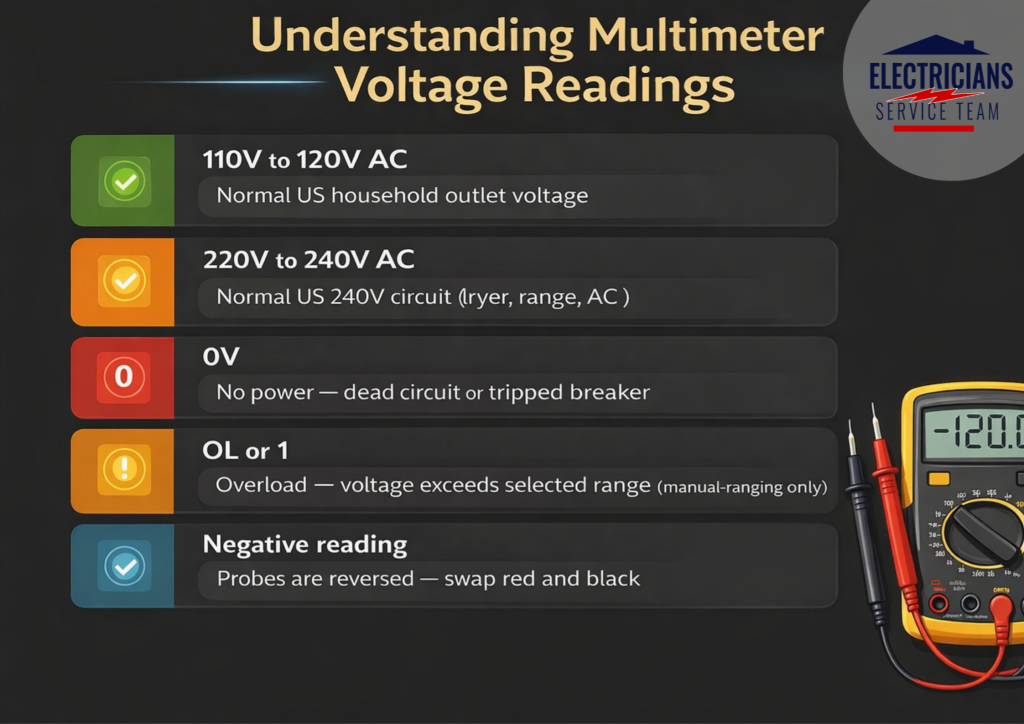
- 110V to 120V: Normal — the outlet is working correctly
- 0V: No power — the outlet is dead, the circuit breaker may have tripped, or there is a wiring problem
- Less than 110V: Low voltage — possible loose connection or wiring issue
- More than 125V: High voltage — potentially damaging to appliances and electronics
Step 4: Test a Circuit Breaker
If you suspect a breaker is not working properly you can test the voltage at the breaker panel. Important: Only test breaker panels if you are comfortable working near live electrical components. The bus bars inside a panel are always live and are extremely dangerous. If you are not confident, call a licensed electrician.
- Turn the dial to VAC.
- Touch the black probe to the neutral bar — the silver bar on the side of the panel where white wires connect.
- Touch the red probe to the screw terminal on the breaker you want to test.
- A working 120V breaker should read between 110V and 120V. A working 240V breaker should read between 220V and 240V.
- A reading of 0V means the breaker has failed or tripped and needs to be reset or replaced.
Step 5: Test a Battery
Testing a battery is one of the simplest multimeter tasks and a great way to practice reading the display before testing live circuits.
- Turn the dial to VDC.
- Touch the red probe to the positive terminal of the battery and the black probe to the negative terminal.
- Read the display.
What the reading means for common batteries:
- AA/AAA/C/D batteries: Should read 1.5V when new. Below 1.2V means the battery is weak.
- 9V battery: Should read 9V when new. Below 7V means it needs replacing.
- Car battery: Should read 12.6V when fully charged. Below 12.2V means it is discharged.
Common Multimeter Readings and What They Mean
What a Multimeter Cannot Tell You
A multimeter is a powerful diagnostic tool but it has limitations. It cannot tell you:
- Whether wiring inside your walls is damaged or deteriorating
- Whether your electrical panel is safe and up to code
- Whether circuits are properly grounded
- Whether there are loose connections inside junction boxes or the panel
- Whether your home’s wiring can handle additional electrical load
For a complete assessment of your home’s electrical health, a licensed electrician’s inspection is the only reliable method.
FAQs
No. For basic voltage testing at home a digital auto-ranging multimeter in the $15 to $50 range is more than adequate. Brands like Fluke, Klein Tools, and AstroAI offer reliable entry-level options that will serve most homeowners well for years.
Using the wrong port can damage the multimeter or give inaccurate readings. Always double-check that the black lead is in COM and the red lead is in VΩmA before testing voltage.
No. Voltage is always measured between two points — you need both probes to complete the circuit measurement. Using only one probe will give you no reading.
Watch for flickering lights, frequent breaker trips, sparks, burning smells, or hot outlets. These signs indicate potential hazards that require professional attention.
Testing outlets and batteries is generally safe for careful beginners who follow the safety rules in this guide. Testing inside electrical panels or working with exposed wiring is not recommended for beginners and should always be handled by a licensed electrician.