

We’ve all been there. You’re hanging a shelf, fitting a new light, or chasing a cable — and suddenly the drill bites through something it shouldn’t. That sinking feeling when you realise you’ve drilled straight through an electrical cable is something no homeowner wants to experience.
But here’s the good news: it doesn’t have to be the disaster it feels like in that moment. With the right tools, the right parts, and a calm head, this is a repair that many competent DIYers can handle themselves. In this guide, we’ll walk you through exactly how to fix a drilled or cut electrical cable safely, step by step — the same method used by professional electricians.
First Things First — Stop and Isolate the Power
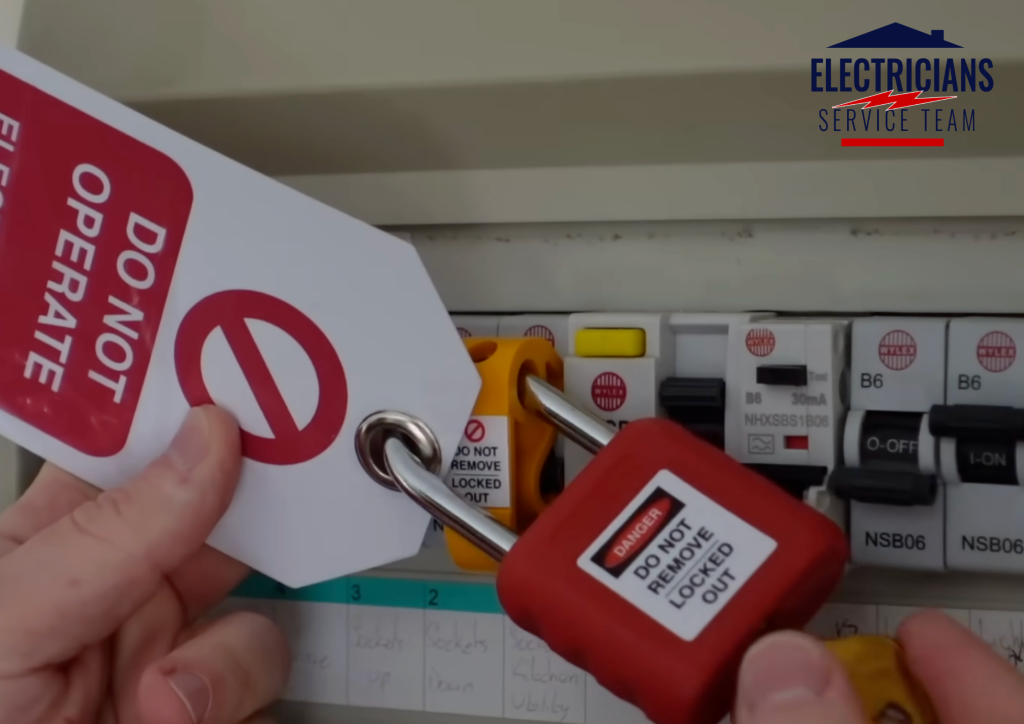
Before you touch anything, your absolute first priority is making the circuit safe. Head straight to your consumer unit (fuse box) and identify the MCB — the circuit breaker — for the circuit you’ve been working on. Switch it off.
Better still, fit a lockout kit to the MCB once it’s off. This small but important device physically prevents anyone from switching the breaker back on while you’re working — whether that’s a family member who doesn’t know what you’re doing, or simply an accidental knock. Don’t skip this step. It could save your life.
Once the circuit is isolated and you’ve confirmed there’s no power running to the cable, you’re safe to continue.
Assess the Damage
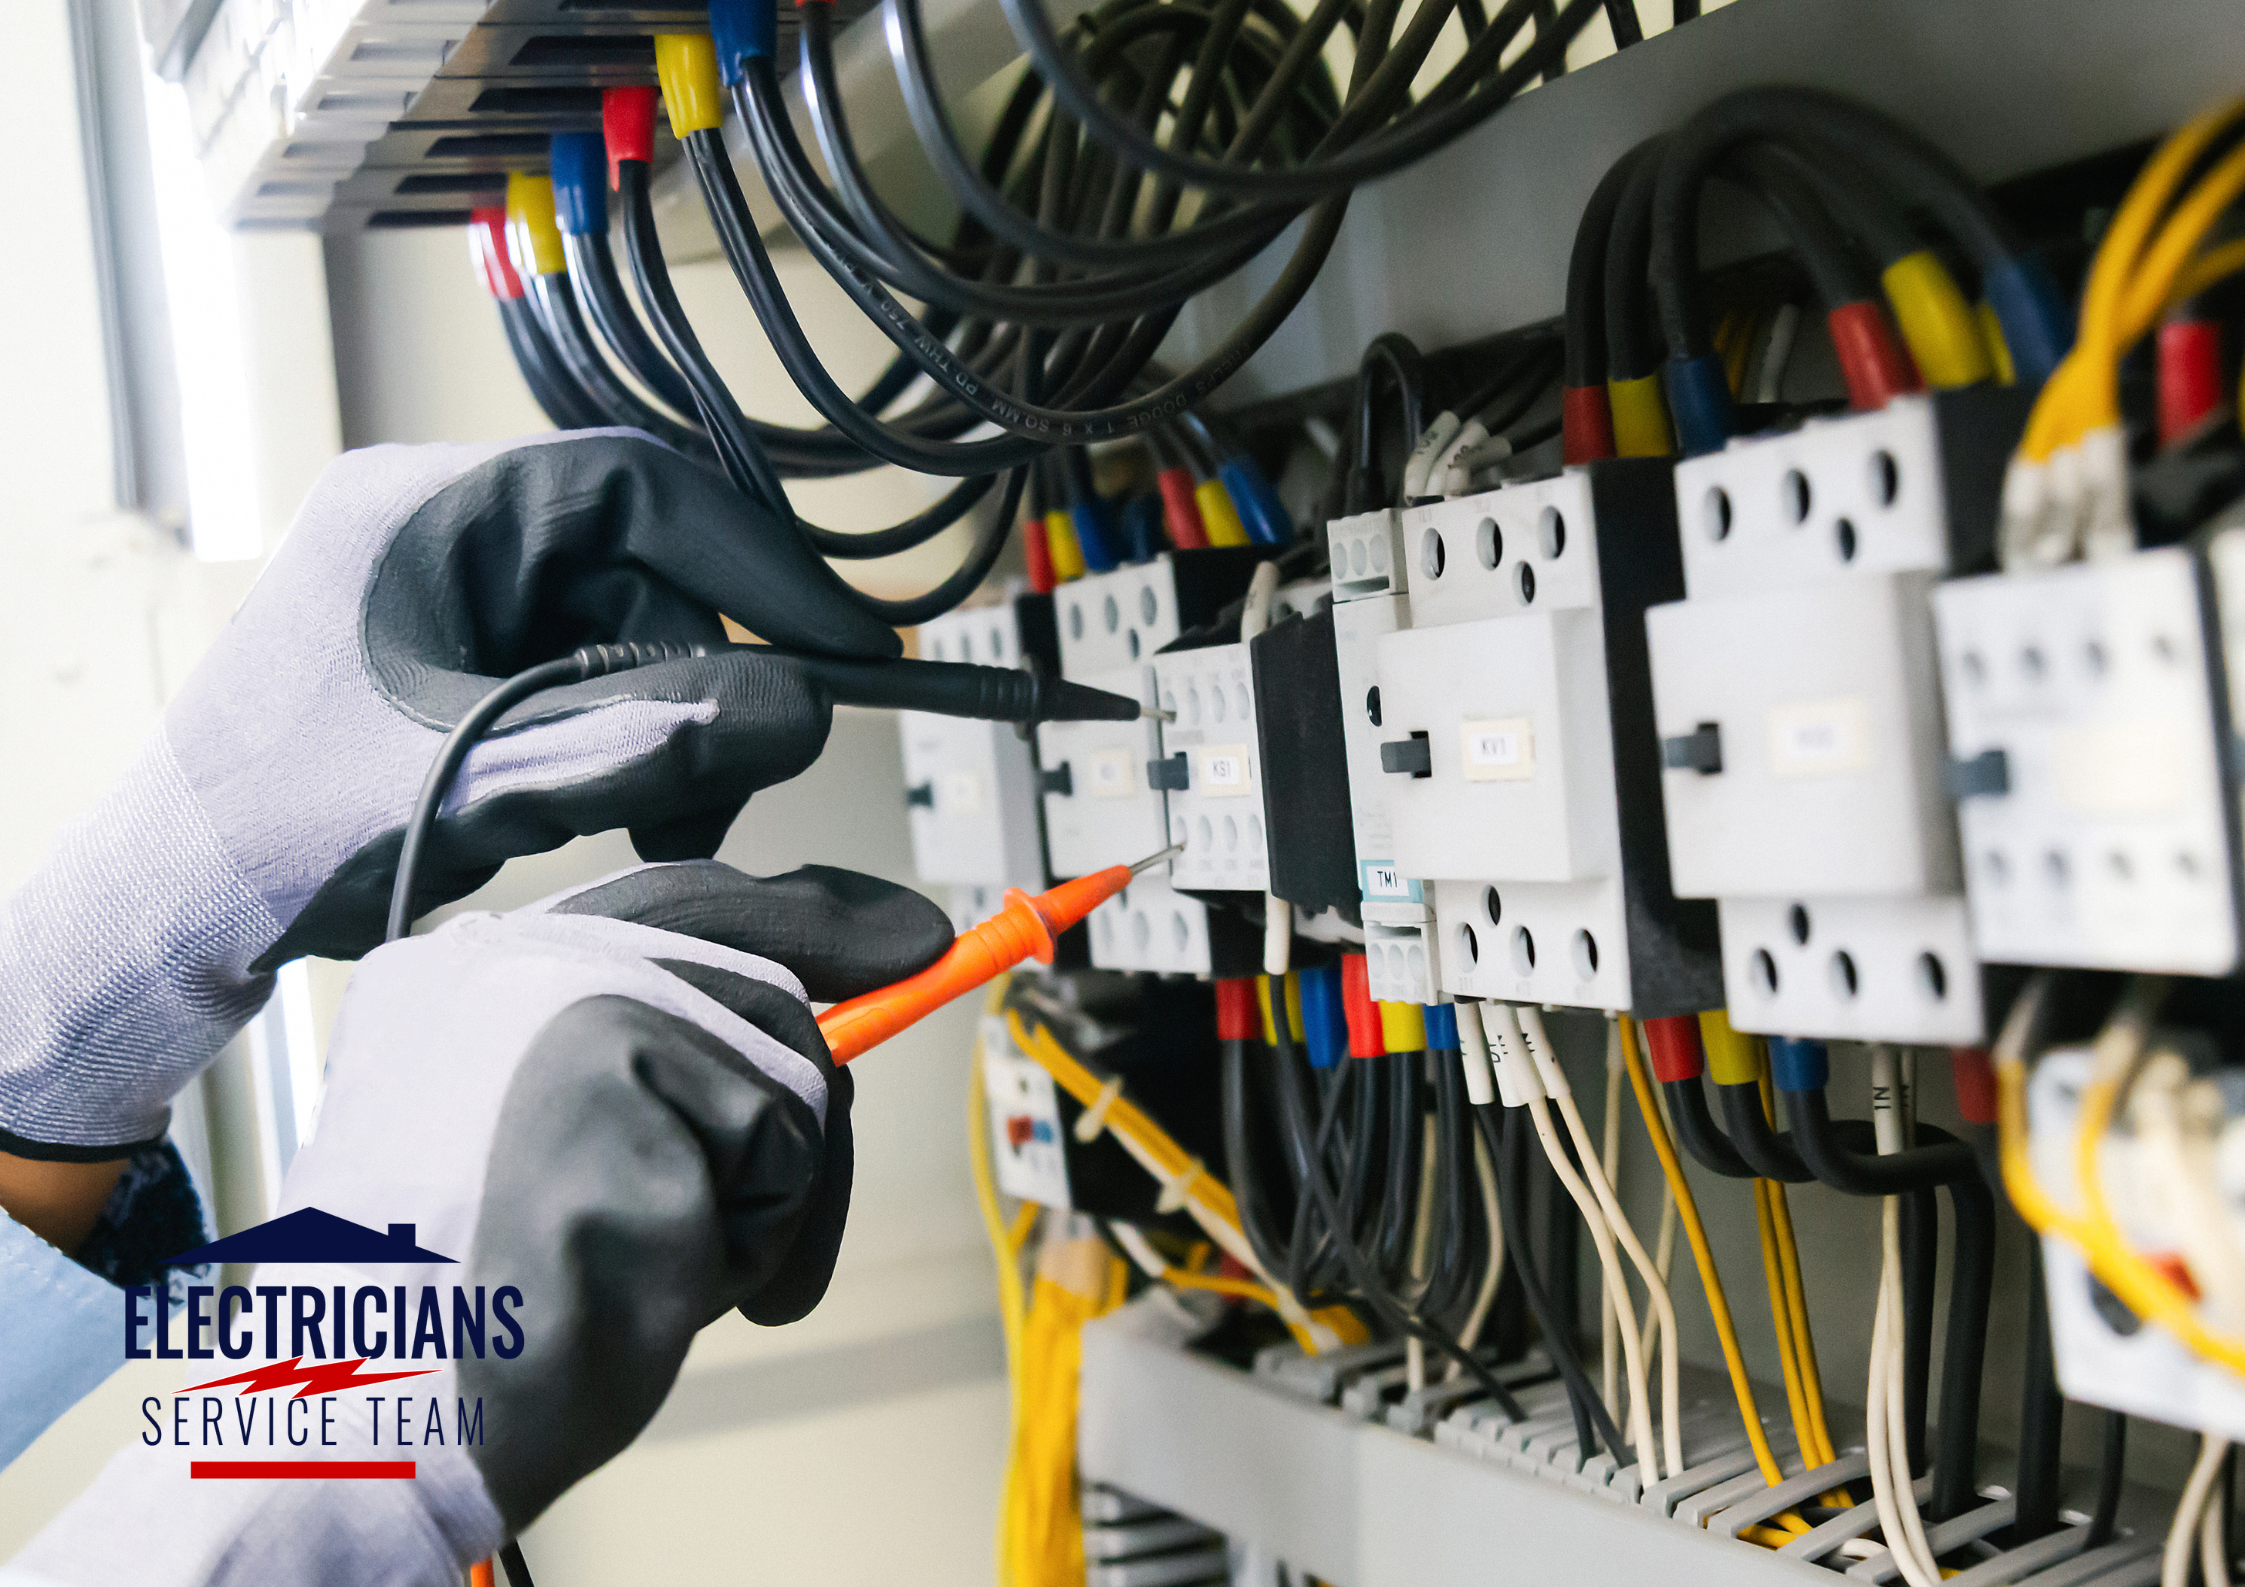
Now it’s time to see exactly what you’re dealing with. Use a multitool — or a chisel if that’s what you have — to carefully open up a small hole in the plasterboard around the drill point. Take your time here and don’t go too deep; the last thing you want to do is cause any further damage to the cable.
Once you’ve broken through, you’ll be able to see how the cable is routed. In many walls — particularly dot-and-dab constructions — you’ll find the cable running inside oval conduit. This plastic sleeve protects the cable but will need to be opened up before you can make the repair. Use a pair of snips and work gradually into the conduit from the outside in rather than cutting straight through it with a knife, which risks slicing the cable again.
At this point, take an honest look at the situation. If it’s at all possible to pull the old cable out and run a brand new one, that is always the better option. A fresh cable with no joints is cleaner, safer, and more professional. However, for most DIY scenarios — especially where cables are buried inside walls — a full replacement simply isn’t practical. In that case, a properly made junction box repair is the correct and accepted solution.

What You'll Need for the Repair
Before going any further, make sure you have everything to hand:
- Multitool or chisel
- Side cutters and snips
- Automatic wire strippers
- A maintenance-free junction box (the Hager J83 is an excellent choice)
- Green and yellow earth sleeving
- Wall plugs, screws, and a drill
- Tracer pencil
- Filler, sandpaper, and paint for making good
The junction box deserves a special mention here. Because this repair will be concealed permanently behind plasterboard, you must use a maintenance-free junction box. These have screwless push-fit terminals and built-in cable clamps, meaning they require no future access once the wall is closed up. A standard junction box with screw terminals cannot be buried in a wall — it needs to remain accessible, which defeats the purpose entirely.
Making the Repair
With access opened up and your tools ready, start by cutting the cable at the exact point where the drill hole is. Use your side cutters and snip it cleanly. This is one of the most important steps in the whole process — cut the cable at the drill hole, not somewhere else. The reason is simple: if you cut the cable further away from the damage, you lose precious cable length and won’t have enough to reach both terminals in the junction box. Cut right at the hole and you’ll have just enough on each side.
Once the cable is cut, move both ends aside and clear away the remaining conduit so you have a clean working area.
Next, hold the junction box up to the wall at the repair point and trace around it with a pencil. Using your multitool or chisel, cut and chip away enough material to allow the box to sit flush in the wall. On dot-and-dab blockwork this comes away easily; on brick it’ll take a bit more effort. Either way, take the time to do this properly — a well-seated box makes the plastering stage much neater.
Mark the mounting holes through the back of the box, drill them out, fit wall plugs, and screw the box firmly into place. Go steady with the screws; overtightening will crack the plastic housing.
Stripping and Wiring the Cables
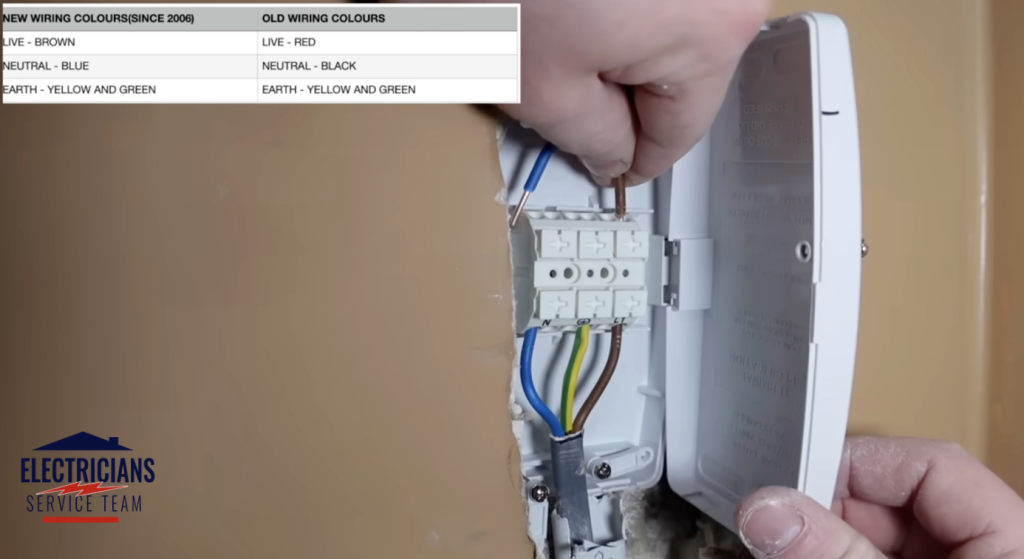
Now for the electrical work itself. On both cable ends, carefully remove the outer grey sheath back to just where the cable clamp will sit. You don’t need to remove much — just enough to expose the individual conductors inside. Keep the sheath on right up to the clamp position.
Next, strip back the insulation on each conductor using your wire strippers. You’ll have three wires in a standard cable: brown (live), blue (neutral), and a bare copper wire which is the earth, sometimes called the CPC. Before wiring, slide a length of green and yellow earth sleeving over the bare copper wire on both cable ends. This is a requirement, not optional — bare copper must always be sleeved where it’s exposed.
Now wire into the junction box terminals. The layout is straightforward: live on one side, neutral on the other, earth in the middle. Push each conductor firmly into its correct terminal and give it a tug to confirm it’s properly locked in. Do this for both ends of the cable, then tighten the cable clamps down over the outer sheaths to hold everything securely in place. Fit the lid on the box.
Testing and Making Good
Before you close up the wall, restore power at the consumer unit and test the circuit. Switch on lights, plug in a tester — whatever is appropriate for the circuit you’ve been working on. If everything comes on as it should, the repair is good.
Once you’re satisfied, you can go ahead and make good the wall. Fill the hole with a suitable filler or patching plaster, allow it to dry fully, sand it back smooth, and repaint. When it’s done, there will be no trace of the repair — and the maintenance-free junction box sitting inside the wall will never need to be touched again.
When You Should Call a Professional Electrician
This repair is well within reach for a confident DIYer — but there are situations where calling in a qualified electrician is absolutely the right call.
If you don’t have enough cable slack to reach the junction box terminals comfortably, the cable will need to be re-run. This isn’t a DIY fix — it requires an electrician to pull new cable through the wall. Similarly, if the damage is more extensive than a single drill hole, if you’re unsure which circuit you’ve damaged, or if you’re simply not comfortable working around electrical wiring, please don’t push through it. The risk isn’t worth it.
A qualified electrician can also issue the appropriate certification for the work, which may be required by your insurer or if you’re planning to sell your property. It’s always worth asking.
If you’d rather have a professional handle it, our qualified electricians are available for fast call-outs. Get in touch today for a free, no-obligation quote — we’ll have it sorted safely and correctly, first time.
FAQs
No. Electrical tape is not a safe or compliant repair for a damaged cable. You need a proper maintenance-free junction box with secure terminals. Taped repairs can overheat, arc, or fail over time and represent a genuine fire risk.
In most cases a like-for-like cable repair of this kind falls outside the scope of notifiable work, but requirements vary. If you want complete peace of mind, have the repair carried out or inspected by a qualified electrician who can certify it properly.
Your consumer unit’s MCBs should be labelled. If they aren’t — which is surprisingly common in older properties — use a non-contact voltage tester to identify the live circuit before switching anything off.
The same repair method applies, but gaining access to the cable will be more work. In solid brick or concrete walls, you may need a hammer and chisel rather than a multitool, and re-plastering will take more effort. If the cable is buried deep, a professional may be better placed to handle it.


