Is your electrical outlet worn out, cracked, or simply not working? Replacing an electrical outlet is one of the most common and beginner-friendly DIY home electrical projects you can do yourself — no licensed electrician required. In this guide, we will walk you through every step of the process using clear instructions, important safety tips, and professional advice so you can get the job done confidently and correctly.
In this example, we are replacing an old standard outlet with a Leviton Decora Tamper-Resistant 15 Amp outlet — a safer, modern option that is great for homes with children.
What You Will Need (Tools & Materials)
- New outlet (e.g., Leviton Decora Tamper-Resistant 15 Amp)
- Flathead screwdriver
- Phillips head screwdriver
- Non-contact voltage tester
- Wire nuts (if pigtailing)
- Electrical tape (optional but recommended)
- Outlet plug tester
Step-by-Step: How to Replace an Electrical Outlet
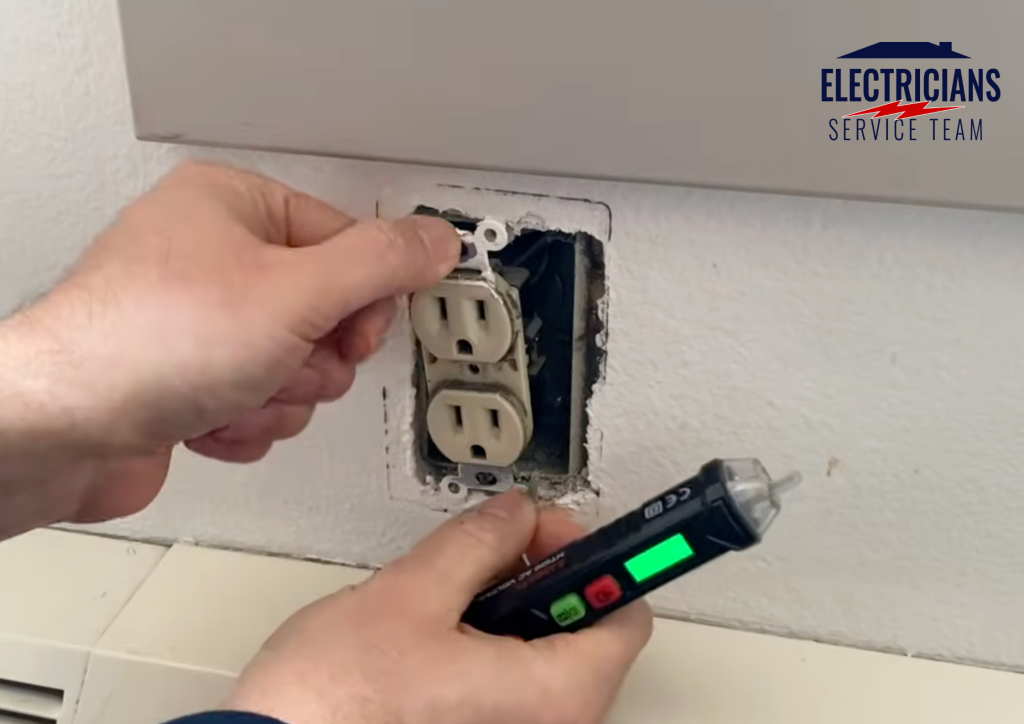
Step 1: Turn Off the Power
Go to your electrical panel and flip off the breaker that controls the outlet you are replacing. Once the breaker is off, use a non-contact voltage tester on the outlet to confirm there is zero power. The tester should show no reading or indicator light. Do not skip this step — it is the most important safety check in the entire process.
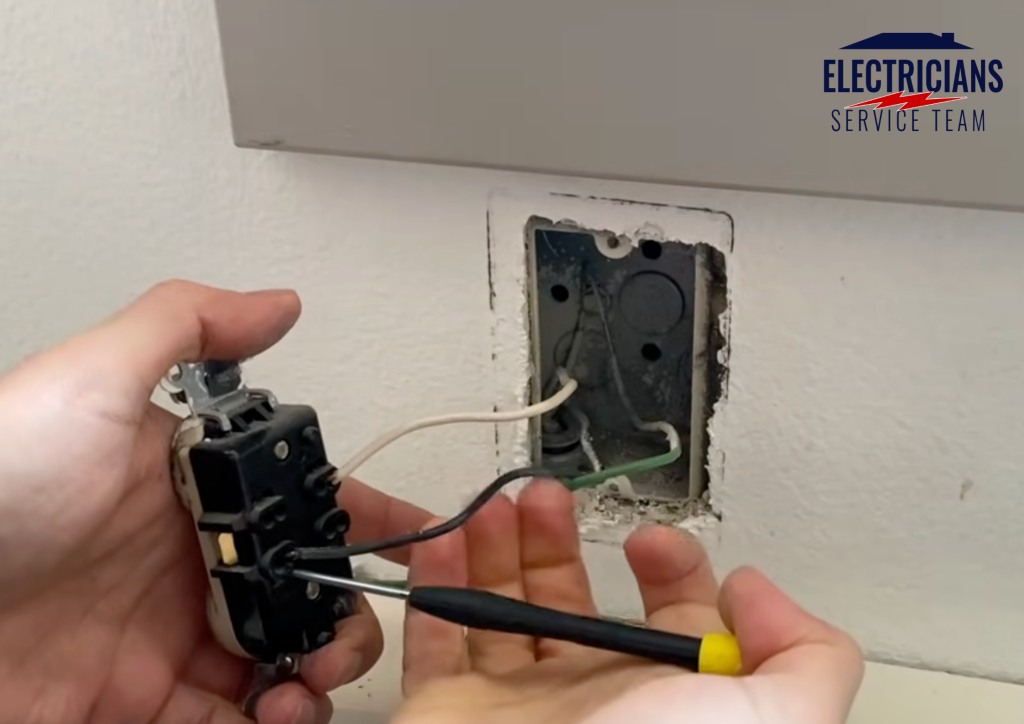
Step 2: Remove the Old Outlet
Unscrew and remove the outlet cover plate. Then remove the two screws holding the outlet to the electrical box and gently pull the outlet out. Before removing the wires, take a photo of how the wires are connected — this is a simple but helpful reference when wiring the new outlet.
Step 3: Disconnect the Wires
Old outlets often use a back-stab connection method. To release the wires, insert a small flathead screwdriver into the release slot next to each wire and the wire will slide right out. Remove all wires — black (hot), white (neutral), and green or bare copper (ground).
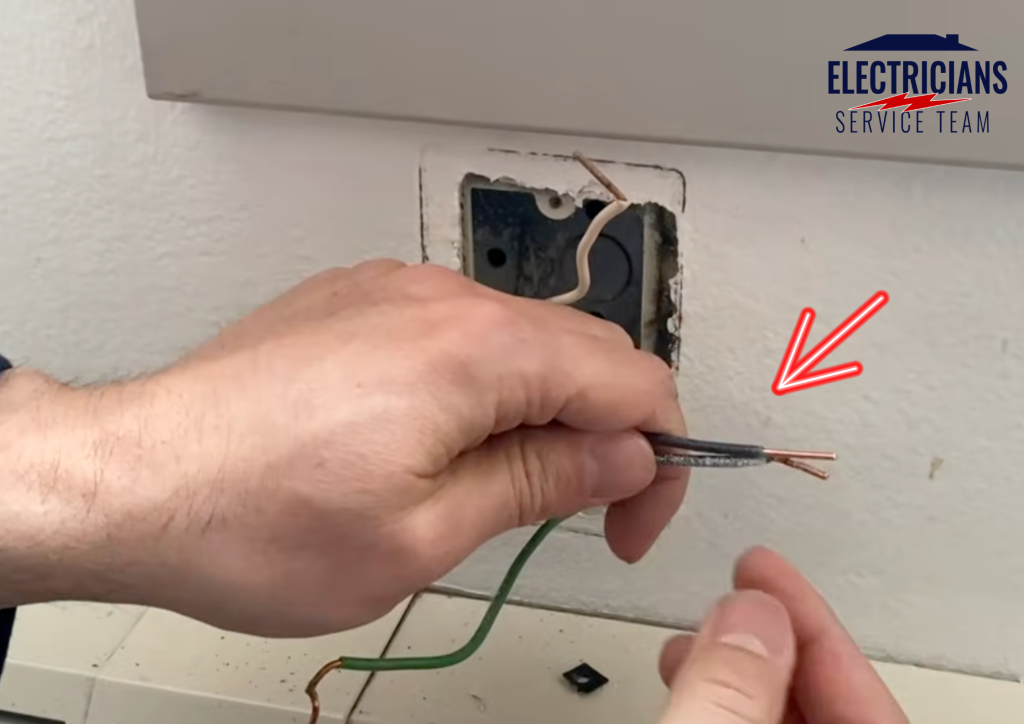
Pro Tip: Inspect the wire ends. If they look damaged, nicked, or brittle, use wire strippers to expose a fresh section of wire before connecting to the new outlet.
Step 4: Handle Multiple Wire Pairs with the Pigtail Method
If you open the box and find two, three, or even four pairs of wires, do not connect them all directly to the outlet terminals. Instead, use the pigtail method:
- Bundle all the black (hot) wires together and add a short extra black wire, securing them all with a wire nut.
- Do the same for all the white (neutral) wires.
- Connect only the single short pigtail wire from each bundle to the outlet.
This ensures the outlet only has one pair of wires connected, which is the safest and most reliable approach.
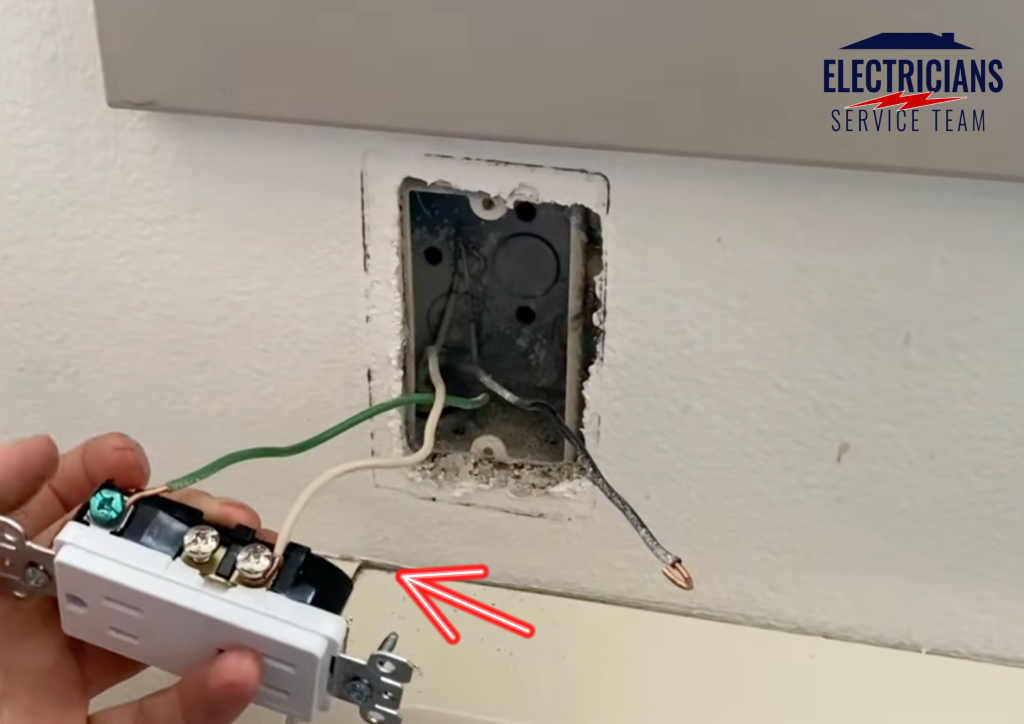
Step 5: Connect the Wires to the New Outlet
Now connect the wires to your new outlet. Follow this wiring color code:
- Ground wire (green or bare copper): Connect to the green screw.
- Neutral wire (white): Connect to the silver screw on the left side.
- Hot wire (black): Connect to the brass (gold) screw on the right side.
Form the wire into a clockwise loop before tightening the screw — this ensures the screw pulls the wire tighter as you fasten it. Avoid the back-stab (push-in) method; side-screw connections are more secure and longer-lasting. If the electrical box is metal, make sure the screw is tightened all the way so no live terminal is exposed on the sides.
Step 6: Wrap With Electrical Tape (Optional but Recommended)
For extra safety and protection, wrap electrical tape around the sides of the outlet to cover the terminals before pushing it into the box. This is not required by code but is a professional best practice, especially in metal boxes where accidental contact with the sides is possible.
Step 7: Fold the Wires and Seat the Outlet
Carefully fold the wires into the electrical box in an S-curve pattern. This prevents them from bunching up and allows the outlet to sit flush. Gently press the outlet into the box and secure it with the mounting screws.
Step 8: Test Before Putting the Cover Plate On

Before installing the cover plate, go back to the breaker panel and turn the power back on. Plug an outlet tester into the new outlet. Two indicator lights mean the outlet is wired correctly and working properly. If the tester shows an error, turn the power off immediately and double-check your connections.
Step 9: Install the Cover Plate and You Are Done
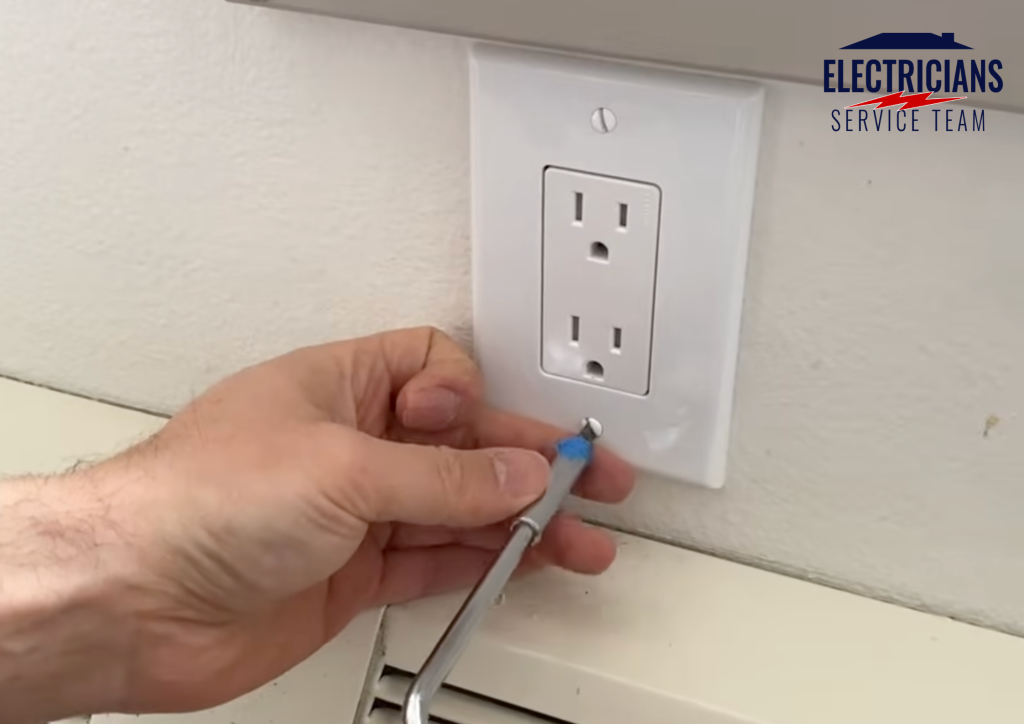
Once the tester confirms correct wiring, turn the power off again, install the cover plate, and turn the power back on for the final time. Your new outlet is installed and ready to use.
Common Mistakes to Avoid When Replacing an Outlet
- Skipping the voltage test: Always verify the power is off with a tester, not just by turning off the breaker.
- Using back-stab connections: These can loosen over time. Always use the side screw terminals.
- Wiring backwards: Connecting the hot wire to the neutral screw is a serious safety hazard. Always match black to brass and white to silver.
- Not pigtailing multiple wires: Connecting more than one pair directly to the outlet puts excess stress on the terminals.
- Forgetting to test before replacing the cover: Always test with an outlet tester before finishing the installation.
FAQs
In most states and provinces, homeowners are legally allowed to do basic electrical repairs in their own homes, including replacing outlets. However, regulations vary by location — always check your local building codes before starting.
For a beginner, replacing a standard outlet typically takes 20 to 45 minutes. With experience, the job can be done in under 15 minutes.
A 15 amp outlet is standard in most home rooms. A 20 amp outlet has a T-shaped slot and is required for kitchen countertops, bathrooms, and laundry areas. Always replace an outlet with one that matches the circuit amperage..
Tamper-resistant outlets have built-in shutters that prevent children from inserting objects into the slots. The NEC (National Electrical Code) now requires tamper-resistant outlets in all new residential construction. They are highly recommended for any home.
Older homes may have two-wire systems without a ground wire. In this case, you can still replace the outlet but should consider upgrading to a GFCI outlet, which provides ground-fault protection even without a ground wire. Label it “No Equipment Ground” as required by code.